
Loading buyer guide
Hurry, don't miss savings on selected furniture & more.* Shop all offers
Choosing campervan Solar Panels is less about finding the most powerful option and more about matching your roof, battery set-up and touring habits. Here’s how to compare panels, portable chargers and kits with fewer costly compromises.
Use our barcode scanner to match products instantly to find the best prices, find products with ease using our voice search and build wish lists and your favourites at the click of a button.
Ecoflow vs Jackery solar panels
EcoFlow and Jackery are often compared by shoppers looking for portable solar charging, but the best choice depends on the listing details: wattage, foldability, connector support, stated efficiency, bundle contents and the real value of any offer.
Best solar panels for small roofs
A small roof does not automatically mean solar is off the table. The key is comparing wattage, footprint, panel type, weight and supporting equipment together, rather than chasing the largest headline output.
Renogy vs Victron Energy solar panels
Renogy and Victron Energy often appeal to different solar shoppers: one is easier to compare around panel bundles, while the other is strongest when you are building a broader power system around charge control and inverter hardware.
JA Solar vs Renogy solar panels
JA Solar and Renogy often suit different solar shoppers: one is usually considered for fixed roof or commercial-style arrays, while the other is commonly browsed for off-grid, vehicle, camping and smaller DIY set-ups. The right choice depends less on the logo and more on wattage, panel format, installation plans, warranty terms and live retailer availability.
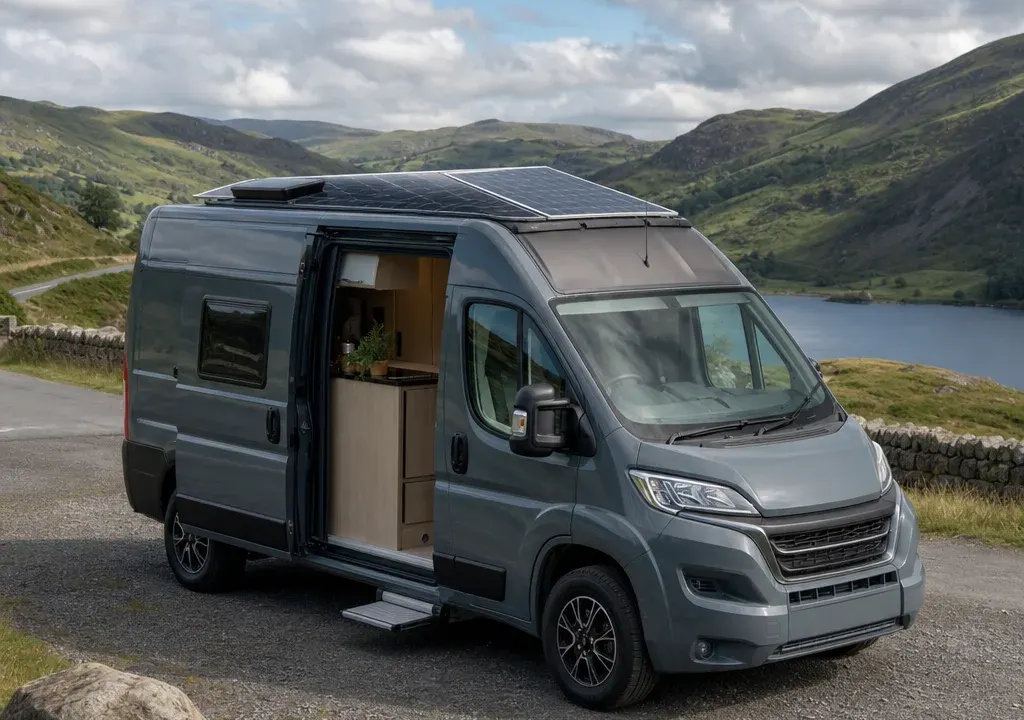
The best solar panels for campervans are not always the highest wattage panels in the Solar Panels category. A good buy is the one that fits your available roof space, suits your battery system, includes the parts you actually need and gives enough charging potential for the way you camp.
For weekend trips, a compact portable charger may be enough to support small devices or light top-ups. For longer off-grid stays, you may want a higher-wattage roof-mounted panel or a kit that pairs panels with a suitable charge controller. The key is to compare complete set-ups, not just panel output.
This guide uses product catalogue signals, visible product details, value indicators and retailer availability as comparison context. It does not claim hands-on testing, and live prices and availability should always be checked before you decide.
Before comparing products, think about what the solar panel has to support. Occasional phone charging, lights and small accessories place very different demands on a system than a fridge, laptops, pumps and longer off-grid stays.
For light use, compact or portable options such as a small 12V panel or foldable-style charger may be more convenient than permanently fitting a large panel. Catalogue examples such as the Sodial 12V 30W Portable Solar Panel sit in this lower-output area, so they are better considered for modest charging needs rather than as a full campervan energy solution.
For more regular touring, compare higher-output panels or multi-panel bundles. Product titles such as the Excel Compact 100W Solar Charger Adventurer, the Eco-Worthy 240W Solar Panel Bifacial 2pcs 120 Watt 12 Volt Monocrystalline Generation Module and the Renogy ShadowFlux Anti-Shading Solar Panel 200W 4 Pieces show the kind of wattage range shoppers may encounter. The right choice depends on your usable mounting area, battery capacity and the devices you expect to run.
Wattage is the headline figure most shoppers look at first, but it should be treated as a comparison point rather than a guarantee of daily energy. Real-world output varies with sunlight, panel angle, shade, season and installation.
A 30W panel can be attractive if you want something small, low-cost and easy to position, but it has limited charging potential. Around 100W is a common comparison point for compact campervan use because it may fit smaller roofs more easily than larger arrays. Bundles described as 200W or 240W can suit shoppers who want more charging potential, but only if the panels physically fit and the rest of the system is specified correctly.
Also check whether a listing refers to one panel, a pair, or multiple pieces. A title that mentions 240W across two 120W panels is not the same fitment challenge as a single panel of similar total output. Multiple smaller panels can sometimes be easier to arrange, but they add more mounting and wiring considerations.
Campervan roofs are rarely blank rectangles. Roof vents, rails, aerials, skylights and storage boxes can all reduce the space available for Solar Panels. Measure the area you can actually use, leaving room for safe mounting and cable routing.
Rigid panels are usually the first choice for shoppers who want a permanent roof installation with a framed module. They need suitable mounting hardware and enough clearance for the frame. Flexible panels can be useful where weight, low profile or a slightly curved surface is the priority, but you should check the product details carefully rather than assuming every flexible panel suits every roof.
The supplied comparison set includes panel products, small DIY solar boards, brackets and power electronics. Items such as Sodial Micro Solar Board Photovoltaic cells are more relevant to small DIY projects than a normal campervan roof installation. Similarly, Sodial Solar Panel Mounting Brackets are accessories rather than power-generating panels, but they highlight an important point: mounting parts can affect the true cost and practicality of a campervan set-up.
A common buying mistake is comparing a bare solar panel with a kit that includes extra components. For a campervan, you may need a charge controller, suitable cables, connectors, fuses, mounting hardware and sometimes an inverter, depending on your system and what you want to power.
If a product is listed as a solar charger, read the contents carefully. It may include more of what a traveller needs, or it may still require separate components. If a product is simply described as a solar panel module, assume you need to verify every supporting part.
Charge controllers are especially important in a battery-based set-up because they manage charging between the panel and battery. Catalogue examples include dedicated controller products such as the Victron Energy Smart Solar MPPT RS 450 200 Charge Controller. That is not itself a panel, so it should be compared as part of a broader system rather than against roof modules on wattage alone.
For campervan shopping, compatibility matters as much as panel output. Check the panel’s stated voltage, the battery system it is intended to work with, the charge controller requirements and the connector type. A panel that looks good value can become less attractive if you need extra adaptors or replacement cabling to make it work safely with your set-up.
Many campervan shoppers look for 12V-oriented products, but the wording varies between listings. The Eco-Worthy example explicitly mentions 12 Volt in the product title, while other products may require closer inspection of the specification. Do not rely on the category image or headline alone.
Connector type is another practical detail. Some panels use common solar connector styles, while portable chargers may use different outputs for power stations or devices. If you already own a leisure battery, power station or existing controller, compare the connector requirements before buying.
A fixed roof panel is convenient because it can charge while parked without being set up each time. It is usually the cleaner option for regular campervan use, provided your roof has enough space and the installation plan is sound.
Portable panels give you more flexibility. You can move the panel into better sun while parking the van in the shade, and you avoid committing to a permanent roof fitment. The trade-off is storage space, set-up time and the need to secure the panel while in use.
Some campervan owners compare a mixed approach: a modest fixed panel for everyday top-ups plus a portable panel for longer stops. When comparing offers, check whether the total spend on two separate products still beats buying a more complete single kit.
Solar Panels often appear with strong promotional discounts, but the cheapest listing is not automatically the best buy for a campervan. A low-cost panel may be excellent for a small project yet unsuitable as the main charging source for travel. A higher-priced kit may be better value if it includes components you would otherwise buy separately.
Compare the live offer against what is included: panel wattage, number of panels, mounting parts, controller, cables, connectors and any accessories. A panel-only product should usually be compared with the added cost of the missing parts. A controller or inverter should be compared separately from panels because it performs a different role.
Also watch for products that belong to a wider Solar Panels ecosystem but are not campervan panels in themselves. Inverter and controller products from brands such as Victron Energy or Huawei may be useful in certain electrical systems, but they should not be treated as direct alternatives to a roof-mounted module or portable solar charger.
For occasional top-ups and small devices, start by comparing compact portable options and lower-wattage panels. Check connector compatibility carefully, especially if you are pairing the product with a power bank, battery box or existing controller.
For weekend touring, a 100W-class solar charger or panel can be a sensible comparison point if it fits your roof or storage space. Look closely at kit contents and whether you need a separate controller or mounting hardware.
For longer off-grid trips, compare 200W-plus set-ups and multi-panel bundles. Products described as 200W or 240W may offer more charging potential, but they also demand more space and a more carefully matched electrical set-up.
For DIY experiments, small solar boards and stabiliser kits can be interesting, but they are not a straightforward substitute for a campervan solar installation. Keep them in a separate shortlist from travel-ready panels and kits.
Measure the mounting area, then compare it with the panel dimensions in the retailer’s product details. Confirm what is included in the box, and do not assume brackets, cables or controllers are supplied unless the listing says so.
Check your battery type and system voltage, then make sure the charge controller and connectors suit that system. If you are unsure about wiring or permanent installation, seek qualified help rather than improvising.
Finally, compare current offers across Solar Panels with the same like-for-like lens: output, size, kit contents, compatibility and total cost. If roof fitting is part of a wider conversion, related areas such as Floor, Wall & Roofs can also be relevant when planning the van interior and structure around the electrical system.
It depends on how you use the van. Small panels around 30W are more suited to modest top-ups, while 100W can be a useful compact comparison point for weekend use. Higher-output 200W-plus set-ups may suit longer off-grid stays, provided you have enough roof space and a compatible battery and controller.
Neither is automatically better. Rigid panels can suit permanent roof installations, while flexible panels may appeal where low profile or weight matters. Compare the exact dimensions, mounting method, heat management guidance and compatibility with your roof before choosing.
For a battery-based campervan solar set-up, a suitable charge controller is normally part of the system. Some kits may include one, while panel-only products may not. Check the listing carefully and make sure the controller matches your panel and battery system.
Portable panels can be useful if you want flexible positioning and do not want a permanent roof installation. They do take storage space and require setting up, so compare them with fixed panels based on how often you stop, how much power you need and how much convenience matters.
Compare wattage, physical size, rigid or flexible design, kit contents, connector type, controller compatibility and the live price. A cheap bare panel may cost more overall once you add missing parts, while a higher-priced kit may offer better total value if it includes the right accessories.
The best campervan solar panel is the one that fits both your van and your travel routine. Start with your power needs, measure the space, then compare complete set-ups rather than headline wattage alone.
Use current Solar Panels offers to build a shortlist, but keep accessories, controllers and connectors in the calculation. A well-matched modest system will usually be more useful than a powerful panel that does not fit, connect or charge the way your campervan requires.
